The preparation of a firearm for either engraving or metal finishing is one of the single most important aspects of completing a quality project. Engraving is usually the last process to be completed before the final finish is applied, so the firearm must be polished/sanded before engraving. Metal that has scratches from factory metal preparation or other fabricating processes will detract from the overall composition of a completed project. The final finish that is applied will not hide or cover scratches from poor preparation — it will make them stand out like a sore thumb.
These techniques and processes are how I prepare a firearm for engraving or final finishing.
Metal Preparation
Proper polish makes for the best finish no matter what your project is.
If you don’t need to remove bluing, you can skip to the next section.
Supply List
- Rubber gloves
- Safety glasses
- Stainless steel containers
- Fine/soft stainless steel brush
- 4F steel wool
- Scott® blue shop paper towels
- Product to remove rust/bluing (see below for recommended products)
Brownells® Rust and Blue Remover
Pros
- Removes bluing quickly with very little effort
Cons
- Not biodegradable
- Can flash rust almost instantly after rinsing in water (extra work)
WD-40® Rust Remover or Evapo-Rust®
Pros
- Biodegradable
- Available locally (automotive stores)
- Creates phosphate coating that protects metal from rusting for a while
Cons
- Time: 30 to 40 minutes
As an engraver, you will generally receive your project for engraving in the white or blued. If it is blued, you must first remove the bluing before polishing the firearm in preparation for engraving.
Safety First! Wear rubber gloves and safety glasses while removing the bluing from a firearm.
Mix your removal product of choice and soak the parts in the stainless steel containers until the bluing is removed. You may need to use 4F steel wool or a fine/soft stainless steel brush to clean out crevasses and stubborn areas on the firearm. Rinse the parts in cold water and dry with paper towels. Ready for polishing.
Polishing
The actual polishing of the metal is accomplished by using various grades of wet or dry sandpaper. There are several different makers of sandpaper, but I use either 3M® or Norton® brands.
The grades that you should have on hand are 120, 220, 240, 320, 400, and 600. These come in 8 1/2″ x 11″ sheets.
I start by folding the sheets and cutting them in half until there are 16 pieces 2 1/8″ x 2 3/4″. It is important to cut the paper with scissors because tearing the paper will leave coarser edges than the grit of paper that you are cutting into smaller pieces.
Supply List
- Sandpaper (120, 220, 240, 320, 400, and 600 Grit)
- Sanding Blocks
Flat
-
-
-
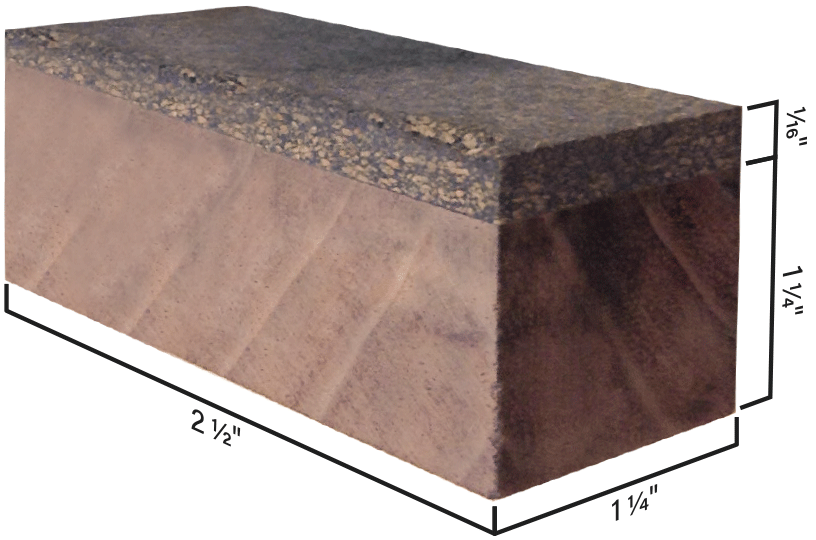
- 3 or 4 blocks of wood that measure 1 1/4″ x 2 1/2″
- 1/16″ rubber or cork glued to one side
-
-
Radius
-
-
-
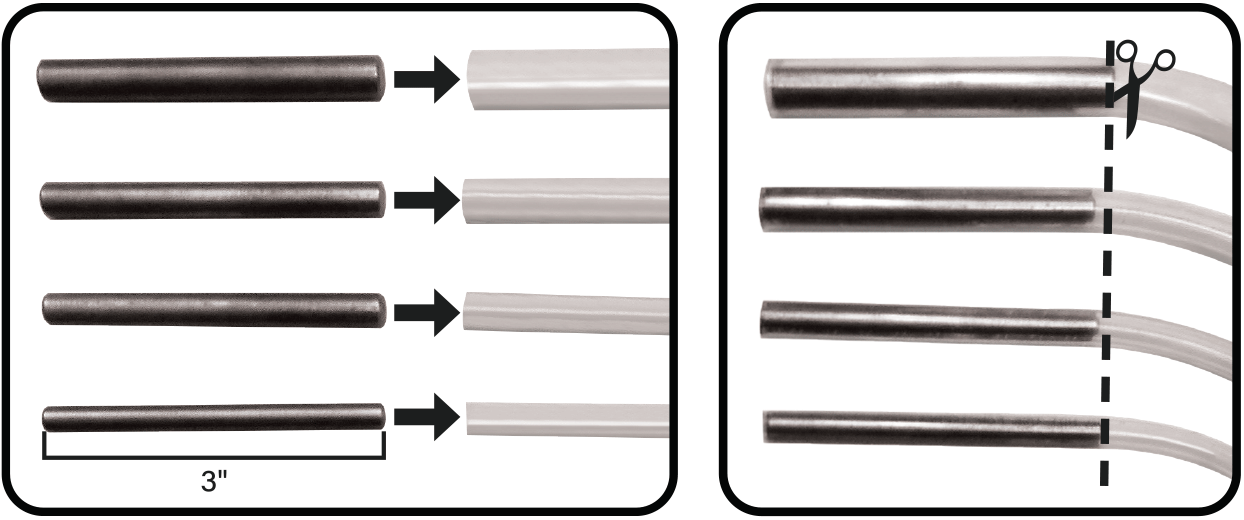
- Plastic tubing (3/16″ 1/4″, 3/8″ 7/16″, and 1/2″ OD)
- Steel rods that fit tightly inside the tubing
-
-
- Sandpaper Lubricant
-
-
- WD-40®
- Marvel Mystery Oil® (preferred)
- Odorless kerosene
-
-
- Scott® blue shop paper towels
Polishing Check (Step 5)
- .0025″ Stainless Steel Brushing Wheel (motorized)
One inch wide, four-row - Mirka® Mirlon Total® Sanding Pads 1500
and 2000 (by hand)
Making the Sanding Blocks
Flat
To hold the paper flat, I use 3 or 4 blocks of wood that measure 1 1/4″ x 2 1/2″ and have a piece of 1/16″ rubber or cork glued to one side. It cushions the paper, so it does not wear out as quickly.
Radius
Curved surfaces require a different configuration. At the local hardware or box store I buy plastic tubing in 3/16″, 1/4″, 3/8″ 7/16″ and 1/2″ OD. I then purchase steel rods that fit tightly inside the tubing and cut them to 3″ lengths. This provides a firm radius block for polishing curved areas.
Polishing Process
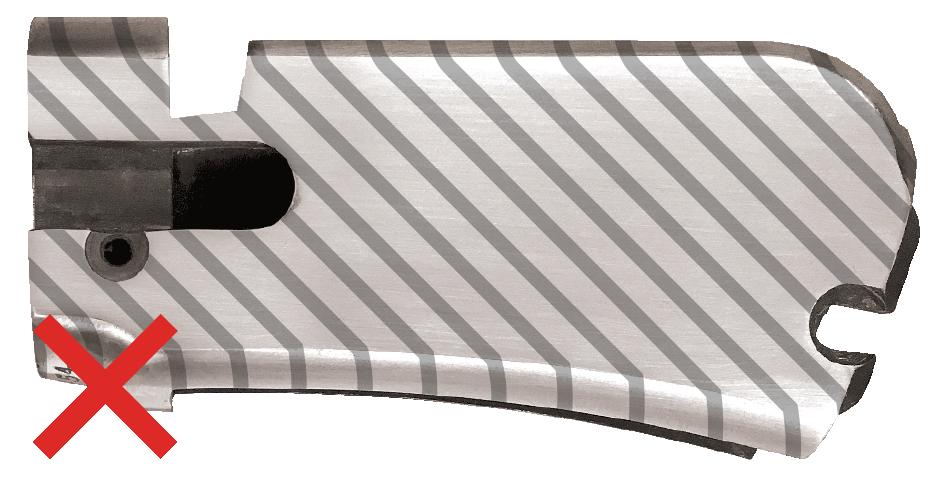
Sand one surface at a time.
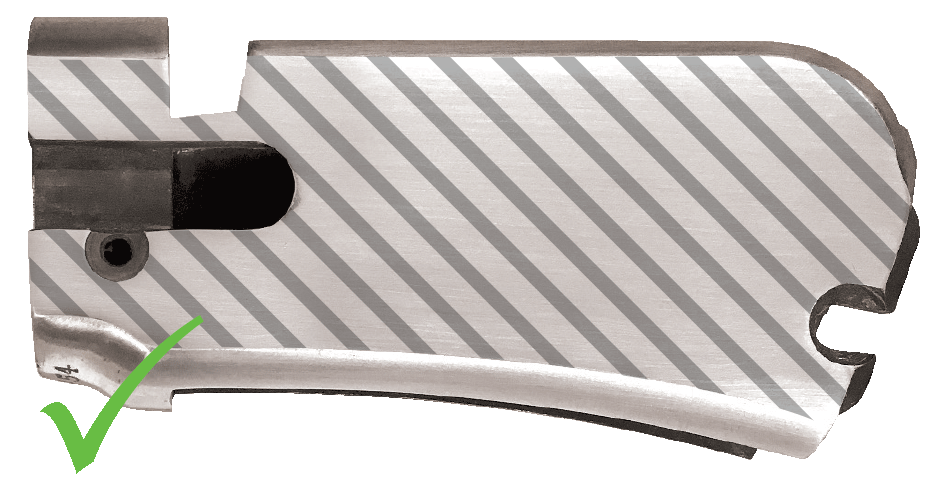
Don’t roll the block over the edge to the next surface; doing so will round the edge and lose the crisp design that was intended.
There are two basic methods of preparing firearms for engraving/finishing.
The first method is mechanical. Mechanical polishing requires the use of felt and cotton polishing wheels that are attached to an electric motor. The wheels are charged with polishing grit which ranges from 120 to 1200. Using this method can wash out the lettering and round any straight edges unless great care is taken. Poor polishing has ruined many fine firearms.
The second method is to hand polish the firearm. This is accomplished by using wet or dry sanding paper, special blocks, and contoured round rods (all homemade) to sand the metal and maintain all of the edges and contours in perfect condition.
How much of the exposed metal do you polish?
There are several views on this topic. Some say, “Only polish what you plan to engrave,” but I believe you need to sand every exposed surface. Doing so gives you a smooth surface that will translate into a finely finished piece. Your engraving is part of a composition. If another person finishes the polishing, they will either spend a lot of time sanding around your work or risk ruining it if they sand into your engraving. By polishing before engraving, you save time and reduce the risk of damage during finishing.
1
220 or 240 grit (or 120 grit if there are filing marks)
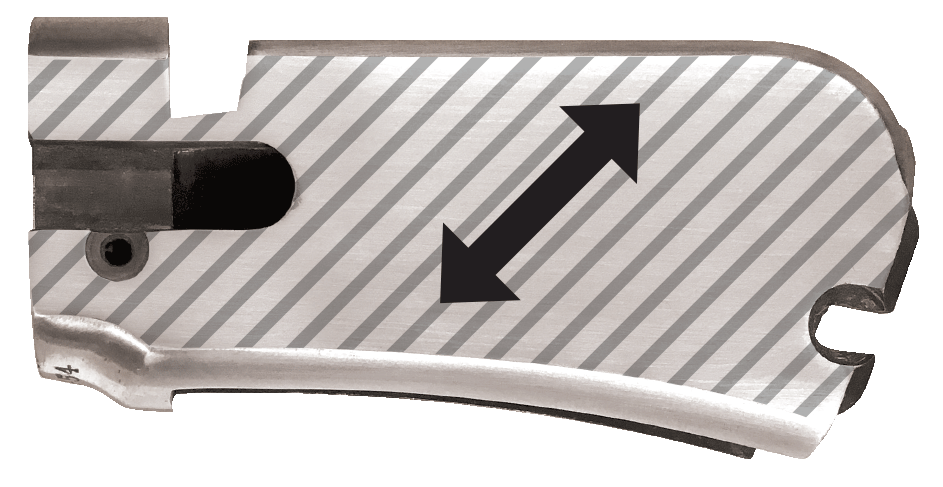
I generally start the process using 220 or 240 grit paper and one of the sanding blocks. There will be times when you will have to start with 120 if there are any filing marks. Lubricate the sandpaper and begin sanding at a 45-degree angle to the length of the piece being polished. Lubricating sandpaper helps it last longer. It also breaks down grit into finer particles and eases the transition when going to the next finer grit in the polishing process.

2
320 grit (or 240 grit if you started at 120)
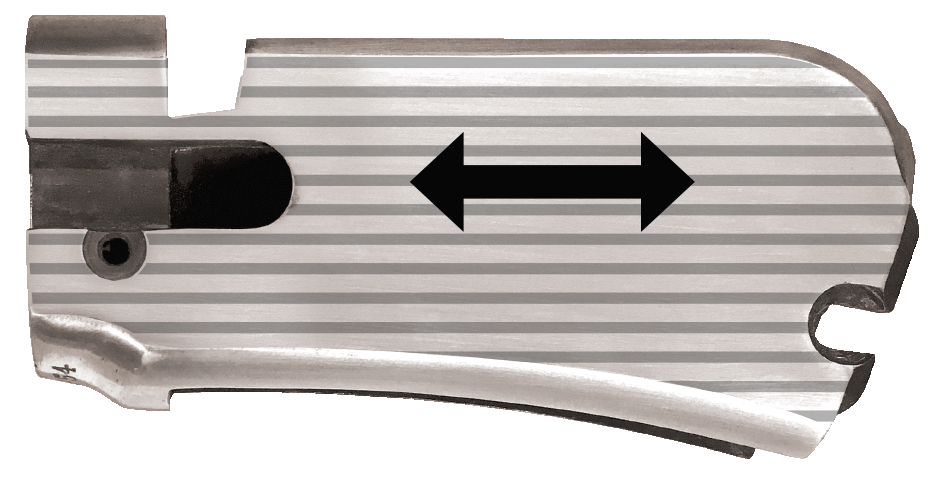
Now it is time for the next grit, 240 or 320. Begin sanding at 90 degrees to the previous sand marks until all of the sanding lines are gone.
Hot Blued, French Greyed, Color Case Hardened, and Other Finishing Processes
Continue below.
3
400 grit
Cross sand as before with 400 grit.
4
Rust Blued 400 grit
Other Finishing Processes 600 grit
Do your final polish by sanding lengthwise on the piece being polished.
5
Check your work
At this point in the process I check my polishing. Scratches can get hidden as you work through your sandpaper progression. Using the brushing wheel or Mirlon pads will make any remaining marks very visible.
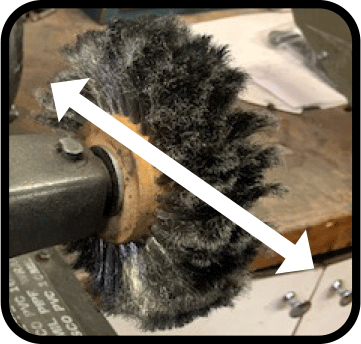
Brushing Wheel (Motorized)
A brushing wheel is the only piece of power equipment I use while polishing. Running the wheel at 1700 RPM, I lightly move the entire piece at a 45-degree angle to the wheel.
Mirlon Pads (By hand)
If you are not set up with a blending wheel you can achieve the same effect using 1500 and 2500 grit Mirka Mirlon Total pads and lubricating oil. Cut the pad into 3″ square pieces. Rub these across the surface at a 45-degree angle.
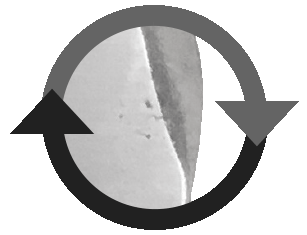
Repeat steps 3–5 as needed.
Closely examine the work under a light to see if any scratches remain. If they do, go back to 400 grit and redo those areas until you are satisfied, again using the blending wheel.
Your engraved project will only be as good as the surface preparation. Follow these simple steps, and your engraving will always look its best.
Now that you’ve finished the preparation, the fun can begin.
Start engraving!

Primarily a stockmaker, metal finisher, and restorer of early American firearms, Bruce built his first rifle when he was 16. Mostly self-taught, he spent lots of time studying the best stockmakers. In 1986, Bruce applied to the American Custom Gunmakers Guild and was accepted. By the mid-90’s he had begun doing restoration work, which led to an interest in engraving. In 2005, Bruce took his first GRS class. He retired from the Department of the Navy in 2004 (after 38 years) and now does firearm stocking/restoration full-time.